Microsoft Planner is a mobile and web-based visual task management and collaboration application that is available to premium, business and educational subscriptions of Microsoft 365. With Microsoft Planner, users can create plans, assign tasks, chat about tasks, share files and see charts of their team’s progress.
This blog post reviews the key features in Microsoft Planner with tips on when and how it’s best to use them.
What is Microsoft Planner used for?
Although it has become a major player in the task management software space, Microsoft Planner is more of a simplified Microsoft Project solution, but richer than apps like To Do or Tasks. Planner is equipped with Kanban boards and to-do lists and offers simple task creation and organization to manage teamwork and projects. It offers an intuitive way to collaborate between users.
Microsoft Project is a project management software product. It is used for managing large projects that require accurate estimation of tasks and the assignment of resources for capacity planning. Tasks can be assigned as predecessors and successors to each other for planning and scheduling. Project managers track tasks to compare time-based resource estimates versus actual usage. Microsoft Project is the next best step up if you need more planning features than those available in Microsoft Planner.
What is a Planner Plan?
A Planner Plan is like a collection of tasks that can be assigned to members of a team. Plan tasks and To Do tasks have similar features. Both have a task name, priority, due date, notes for additional details, contain attachments, and a checklist. However, a Planner task is a little more advanced than a To Do task. A Planner task can be assigned to multiple users, assigned to a Plan bucket, have a start date, use labels (like a category in To Do), include comments from multiple users, and maintain a history.
Here is some guidance on when it’s best to use these different task management solutions.
| To Do | Planner Plan | Microsoft Project |
| Manage my own tasks only. | Manage tasks for a team. | Manage tasks for one or more teams. |
| Daily tasks that have a due date assigned to me. | Tasks that have a start and end date with one or more team members assigned. | Tasks have a start and end date with multiple resources assigned. |
| No estimation of hours to complete task. | No estimation of hours to complete a task. Might be tagged with an indication of high, medium, or low effort. | Estimated hours are assigned to tasks with assigned resources. |
| No reporting. | Reporting on work not started, in progress, and completed. | Extensive reporting on task state and resources consumed. |
Now that we have a baseline on when it’s best to use Microsoft Planner, let’s talk about the top Microsoft Planner features, and tips on how to set up and use each of them.
1. Creating a Planner Plan
Creating a Planner Plan requires a Microsoft 365 Group. You cannot create a Plan without assigning it to an existing Group or creating a new Group. The Plan membership is defined by using the Group owners and membership.
Note: Creating a Microsoft 365 Group will automatically create resources for the members of the Group. These are the common collaboration resources used by team members.
- Shared mailbox
- Shared calendar
- Shared OneNote notebook
- SharePoint team site
- Planner
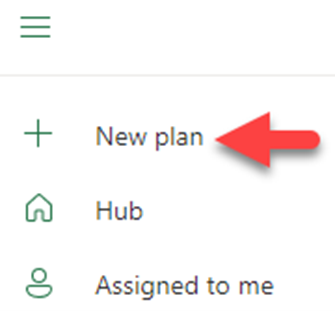
I typically create a Plan in Microsoft Teams or in Planner itself. To create one in Planner, click on New Plan.
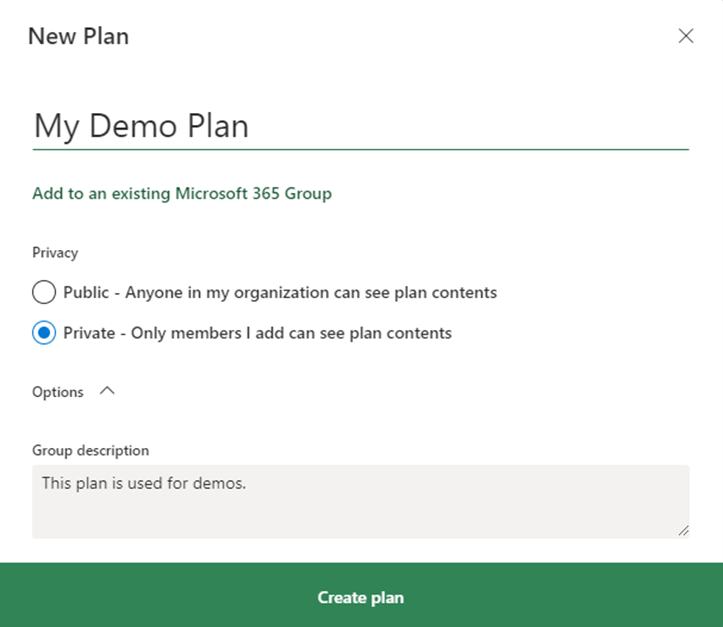
The new plan screen will appear. Give your plan a name, change the privacy setting, and create a group description.
Note: Public plans are visible to everyone in your organization. Private plans are only visible to people you’ve added to the plan. It’s a good idea to limit access to a plan to only your team members. This will prevent everyone from making changes to your plan.
Tip 1: Your organization may have a naming convention to use for Microsoft 365 Group names. A typical naming convention will define the prefix and/or suffixes to use and some sort of identifier (e.g. department, business function) in the middle. The name of your Plan should follow a similar naming convention to avoid having everyone use the same name for their plans.
You can also add your plan to an existing Microsoft 365 Group by clicking on Add to an existing Microsoft 365 Group. Then, the Choose a group for you plan screen will appear.

If you’d like your plan in a new group, click Back, or you can click Create plan to continue.
Your new plan will then be created and appear in the web browser.

2. Creating and assigning tasks
A task is a quantifiable work item that must be finished within a certain period of time or by a certain date. At the end of this task, there is something that is delivered or can be defined as completed. The task entry in a plan should describe the work item and what is required to be delivered or completed.
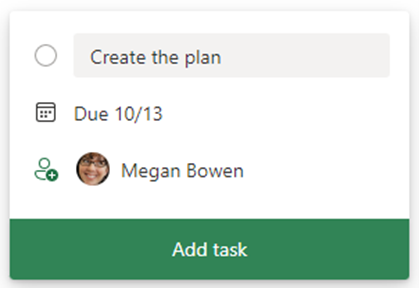
Within each plan, there is an option to create and assign tasks. To create or add a new task, click on Add task.

A new task will appear in the To do bucket. Each task requires a name, enter a unique name for the task. Then you can enter the due date and select or assign someone to be responsible for the task. Planner can send emails and push notifications to assignees if configured to do so. You can learn more about configuring notifications in Groups and Teams here. Some of the activities that trigger a notification are:
- Someone assigns a task to you
- You have tasks that are near or past their due dates
- Any plan member comments after your comment on a task
Tip 2: It’s best to use an action-oriented name for your tasks. You are assigning someone to perform an action here.
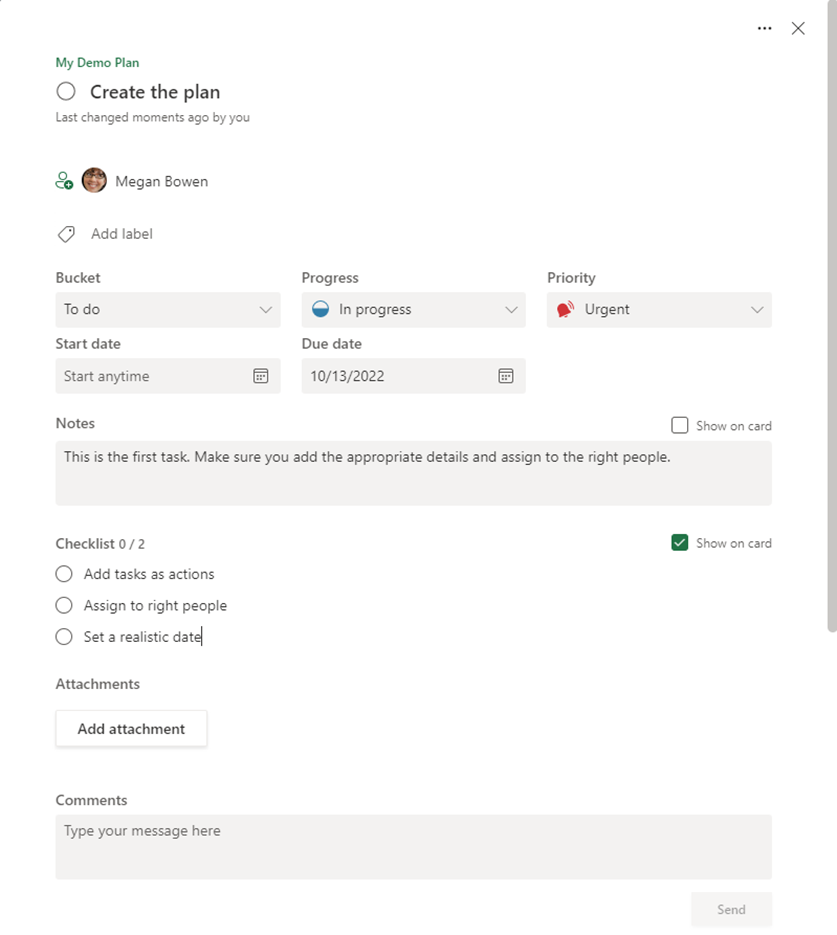
After the task is saved, you can click on it to edit more details. Additionally, you can do the following:
- Set the Progress value to In Progress
- Set Priority to Urgent
- Add Notes: This is the first task. Make sure you add the appropriate details and assign to the right people.
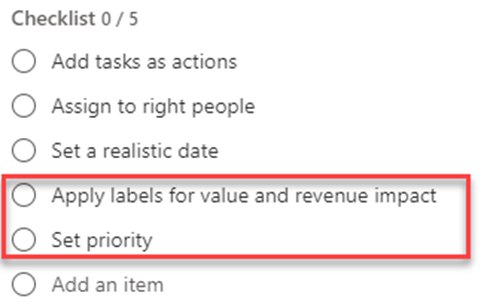
- Add Checklist items by typing in items and hitting Enter.
Note: Planner Plans have a limit of 2,400 active tasks in a plan. You can review additional Planner limits here.
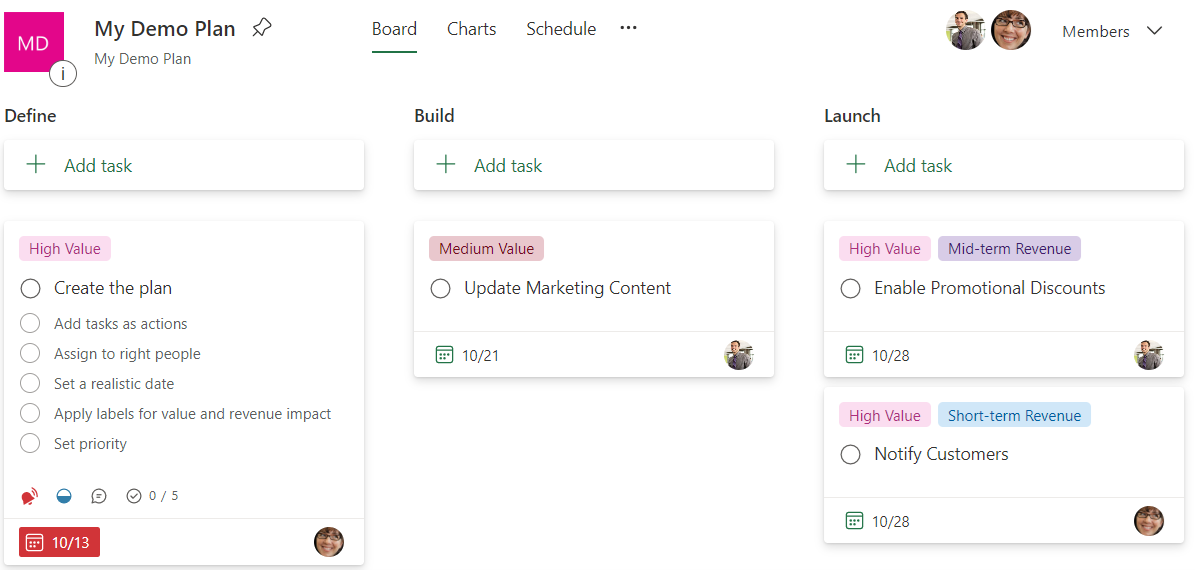
3. Using Labels
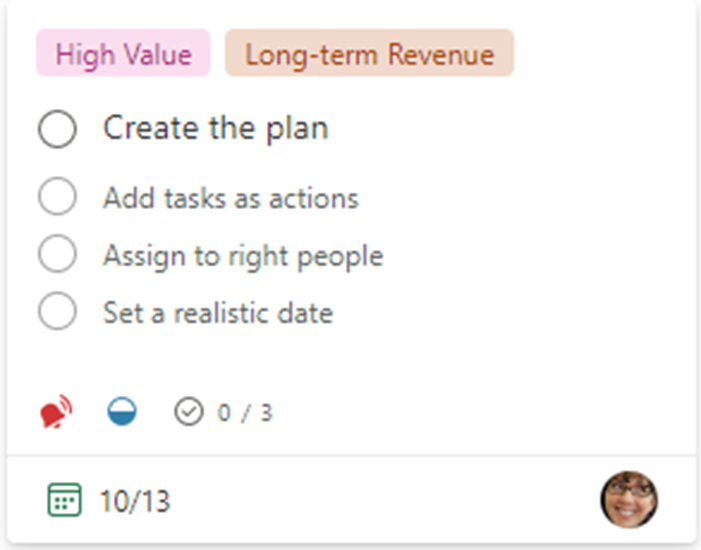
Labels are an interesting feature. Labels are used to see what tagged tasks have in common. Examples include: requirements, locations, dependencies, or important time constraints. You can edit the label value for a feature to make it more relevant for your need. I personally think they are useful for setting values that are not already associated with the task. For example, I might want to set a customer value indicator such as: High Value, Medium Value or Low Value.
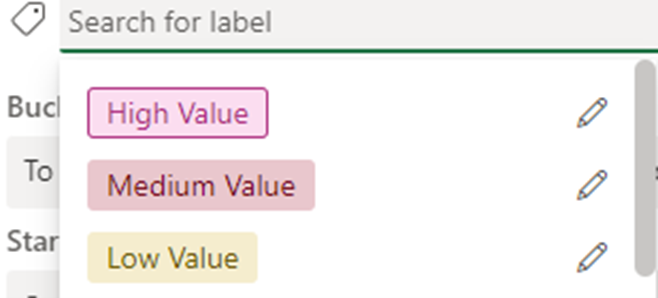
Another set of label values can represent the impact to revenue. For example, Short-term Revenue, Mid-term Revenue or Long-term Revenue.
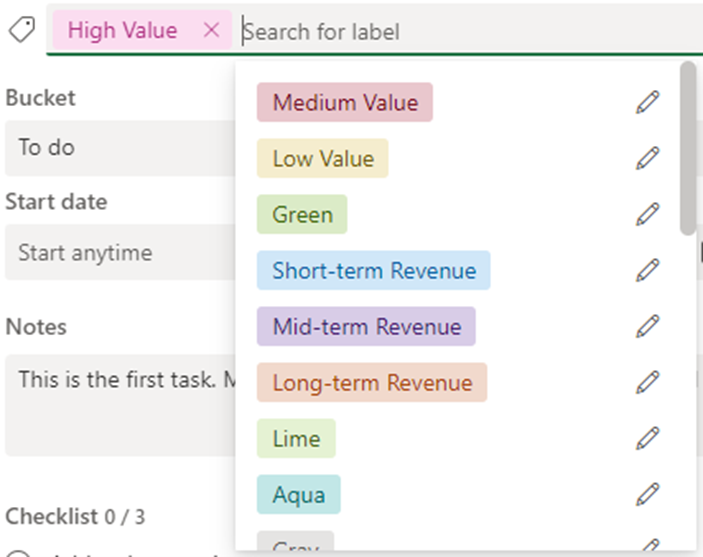
You can set more than one label in a task.
Tip 3: Set label values to properties that can span tasks and buckets. Use them to create a group or collection of tasks for a particular business purpose or value.
Note: There is a limit of 25 labels within a Planner Plan.
4. Organizing with Buckets
Buckets are used to organize your tasks by moving them into work stages. To use the Buckets feature, click on Add new bucket which will create a new bucket.
The action label will change to allow for editing. Be sure to enter a descriptive name for the bucket.

Tip 4: Bucket names should represent project phases or stages, such as Define, Build, Launch, Completed; but not stages in a workflow. An example of bucket names for a Kanban board is To Do, In Progress, and Done.

5. Collaborating in Tasks
Collaboration is unique to Planner Plans. Plan team members can collaborate by updating tasks and by commenting in tasks.
If a plan is set to private, you will need to add another user to access it. Here is an example of how to do this.
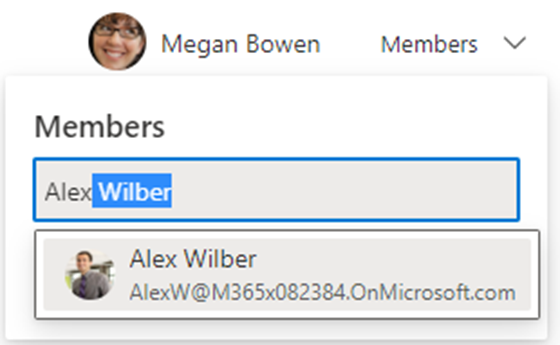
I log in as Alex Weber and open the same Plan. I open the first task and add a comment.

I click Send and the comment appears in the task.
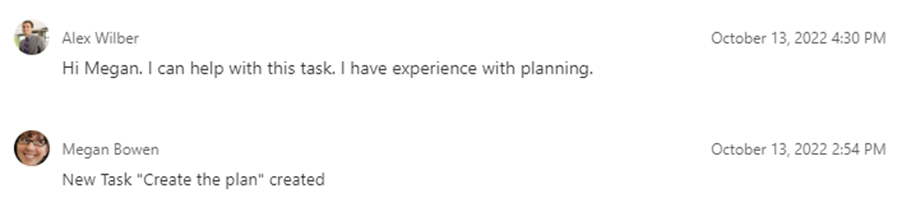
Megan will then see the comment when she opens the same task. Alex can also edit the task by adding more checklist items.
Megan will also see these updated.
Tip 5: Collaborate on tasks with team members to create and update a plan. Each team member can update tasks; but be careful not to overwrite each other’s updates.
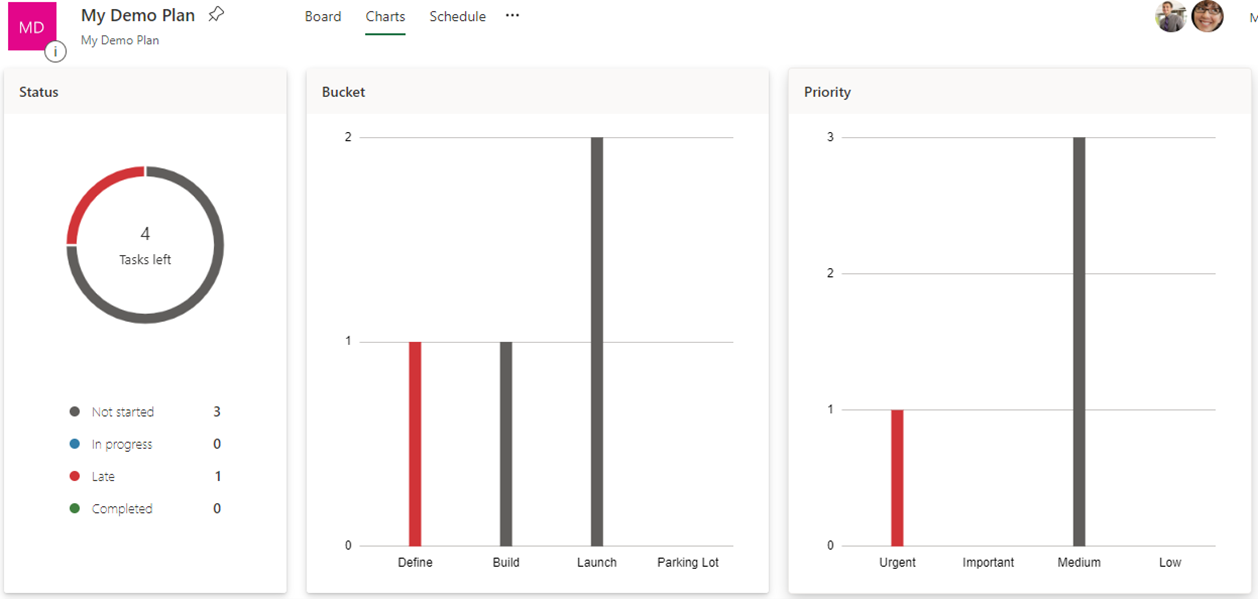
6. Using Chart and Schedule Views
The Charts view in a Plan is used to see how the plan is progressing. You can use it to answer questions like:
- Which tasks are running behind schedule?
- Which tasks have a high priority?
- Which team member is overloaded with tasks?
The Schedule view is used to organize your tasks on a calendar.
I added buckets and a few more tasks to my plan so that I can better show how the Charts and Schedule views display your plan.
Clicking on Charts will open a view that provides a summary of the task status, buckets, and priority. This view is helpful if you want a quick look at how your tasks are organized. That is, you can see how many tasks there are for each status, bucket, and priority.
For example, if you have too many tasks that are in the Build bucket, you will want to move them back to Define.
Also, if you have several tasks with the Urgent priority, you may want to meet with the task assignees to review how these tasks can be completed as soon as possible.
Clicking on Schedule will open a view that displays the tasks in a calendar view based on the due date. This view is helpful for when you want to see the schedule of when tasks are due.
You should see that tasks are spread out over the calendar. You should review the plan if all of tasks have due dates very close to each other. This may be an indication that dependencies between tasks were not considered or that the tasks are poorly defined. The completion of one task should lead to the start of another dependent task.
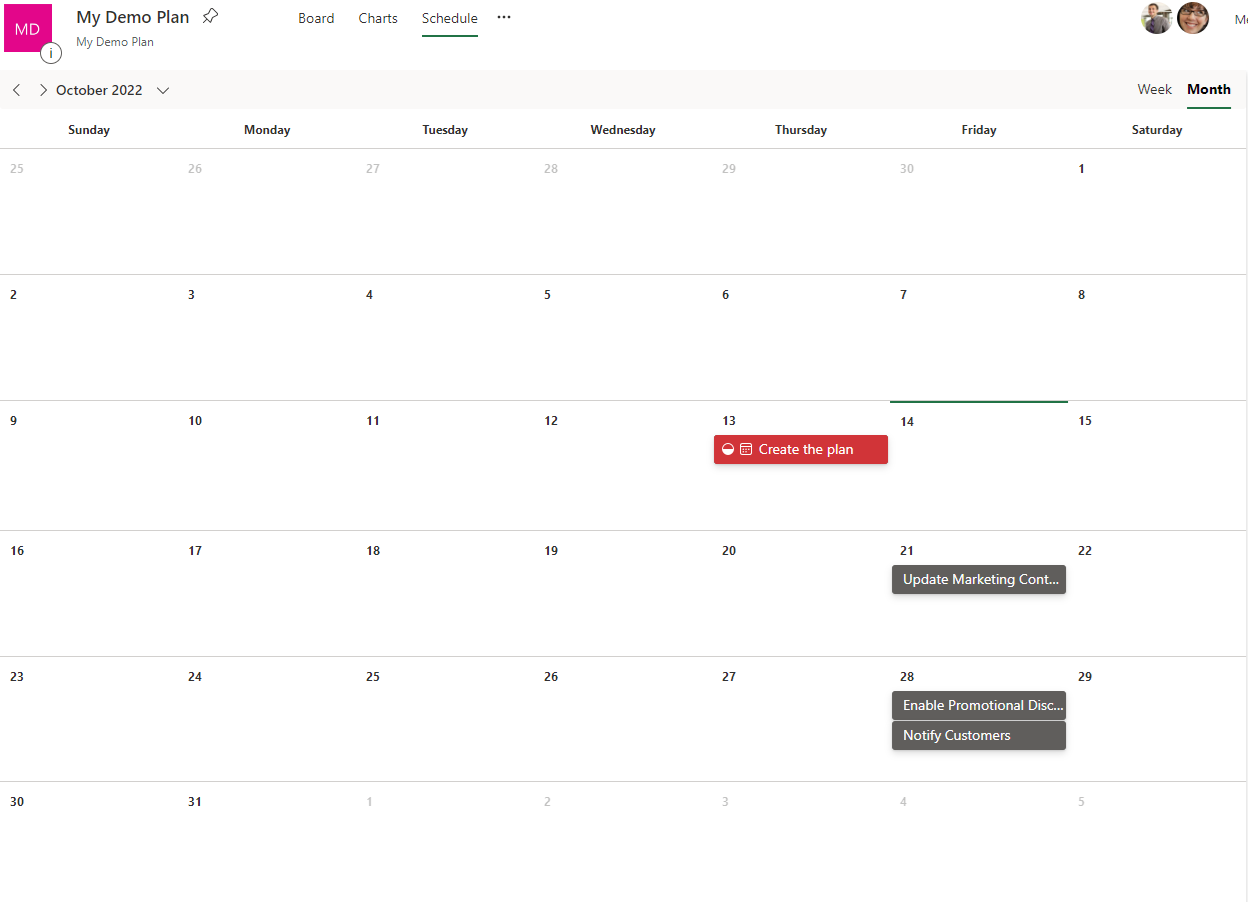
Tip #6: Assign due dates to your tasks and use the Schedule view to ensure that you have your tasks sufficiently spread out over time to complete them with the available resources that you have. You can also drag unscheduled tasks to the calendar to ensure that they are scheduled.
7. Integration with Outlook
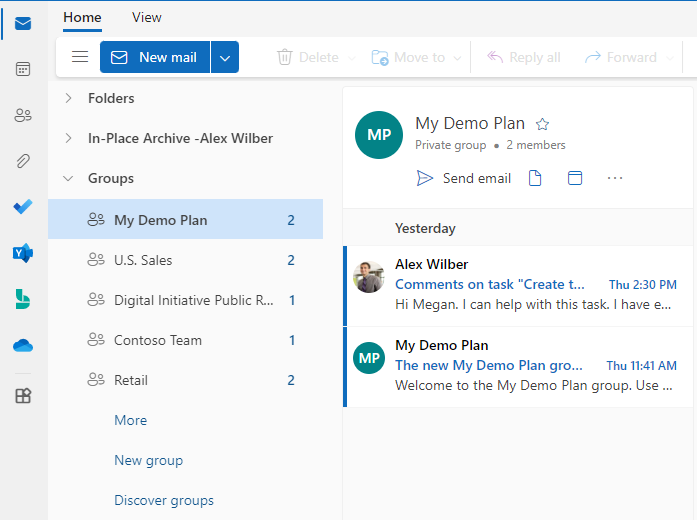
Microsoft Planner is integrated with Outlook to make the collaboration process more seamless. In Outlook, you can see the emails sent by Planner. To open the Group that contains the Planner Plan, follow the steps below.
- Open your Outlook client. I opened one of my demo tenants and Megan Bowen’s Outlook client.
- Scroll down to Groups.
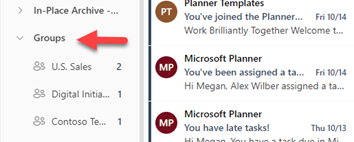
- I collapsed Folders to make it easier to see Groups.
- In this example, you can see the email welcoming Alex to the My Demo Plan. There is a second email linking to the comment that Alex wrote on one of the tasks.
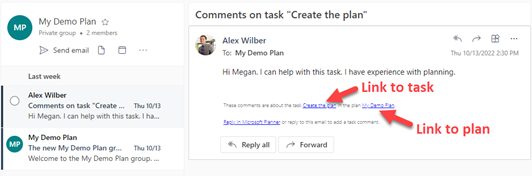
- I open the “Comments” email to see the comment that Alex added to the task. I can also see a link to the task and a link to the plan. Now you can quickly open the task to review and/or update it.
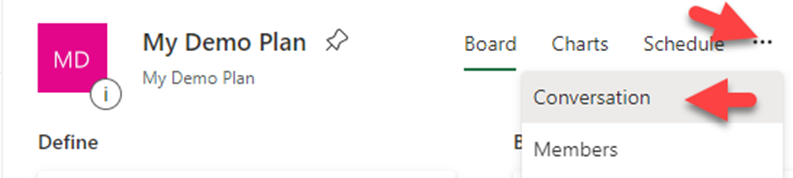
Tip #7: There is also a way to open the same Group in Outlook. But this time you can do it from Planner by clicking on the ellipsis beside Schedule and then on Conversation in the drop-down menu.
8. Integration with To Do in Outlook
You can open To Do in Outlook to see all the Plan tasks assigned to you – from every plan.
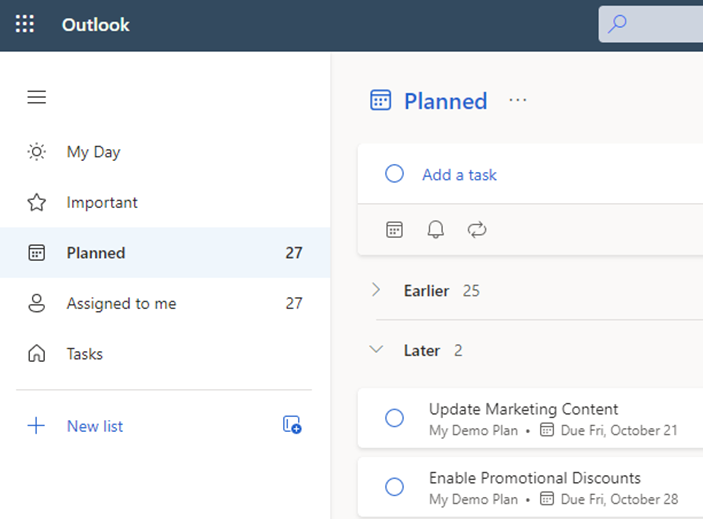
To do this, click on one of the tasks to see the details in the side panel. Here, you can edit some of the task details without returning to the plan. Of course, the task also has a link to open the plan directly.
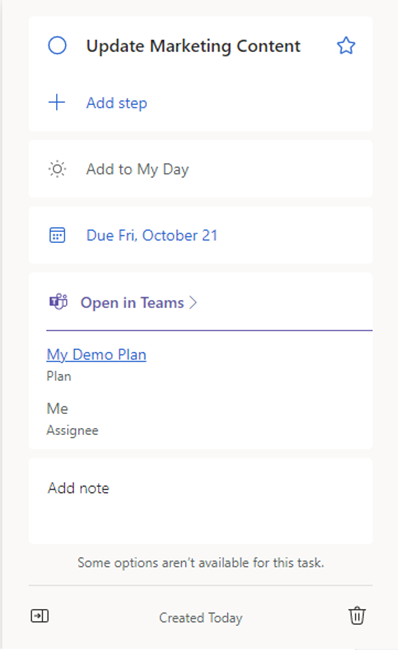
Tip #8: Use To Do to quickly edit and update your tasks across multiple plans.
9. Using Templates
So, there is not really a template feature in Planner. However, you can provide a template experience. The solution is to create a Microsoft 365 Group to hold Plans; but not update them as part of a team project. These plans can then be shared with other users so that they can copy them to their own groups for team projects.
There are a few steps to create a template from an existing plan.
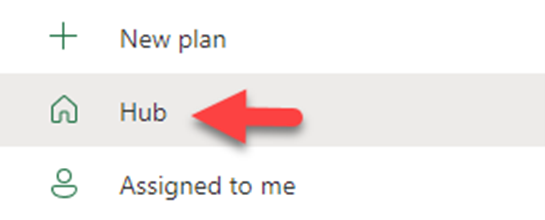
First, go to the Planner Hub by clicking on Hub in Planner.
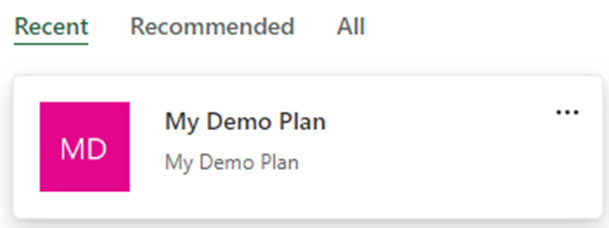
Then, find the Plan that you want to use for a template – look under Recent.
Click on the ellipses and then click on Copy plan.
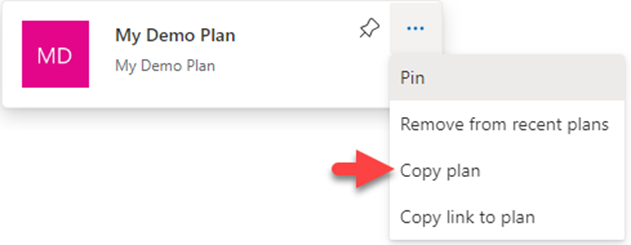
The Copy Plan screen will appear.
Here, you will enter a name for the template.
Then, select a Microsoft 365 Group to copy it to. Ideally, you have a Group or create a new Group to contain Plan templates.
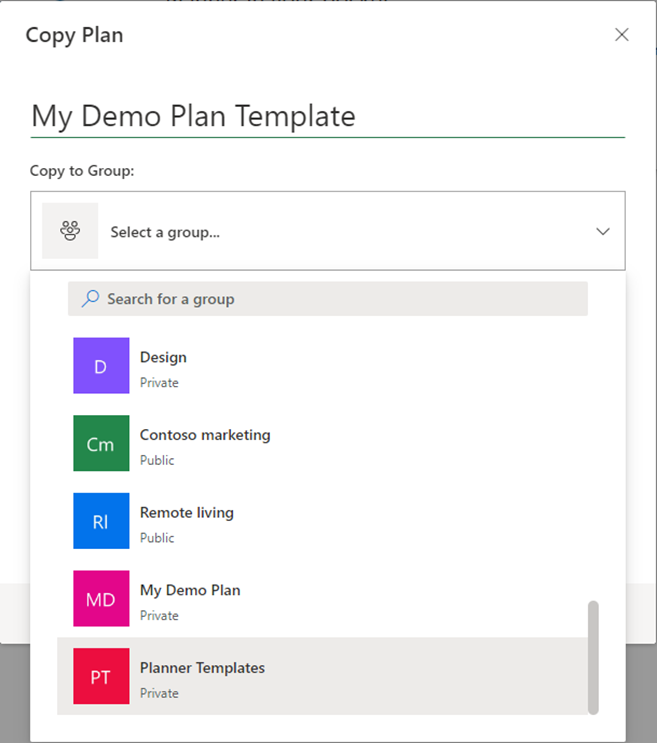
Choose which task properties that you want to copy from the source plan to the new plan.
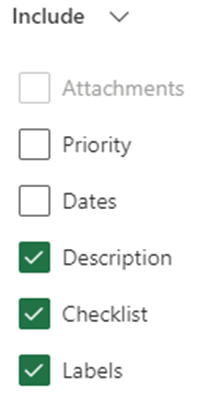
Note: You can only copy attachments if you are copying in the same Group.
Then, click Copy Plan to continue.
The new Plan is then created in the selected Group with the selected properties copied over for tasks.
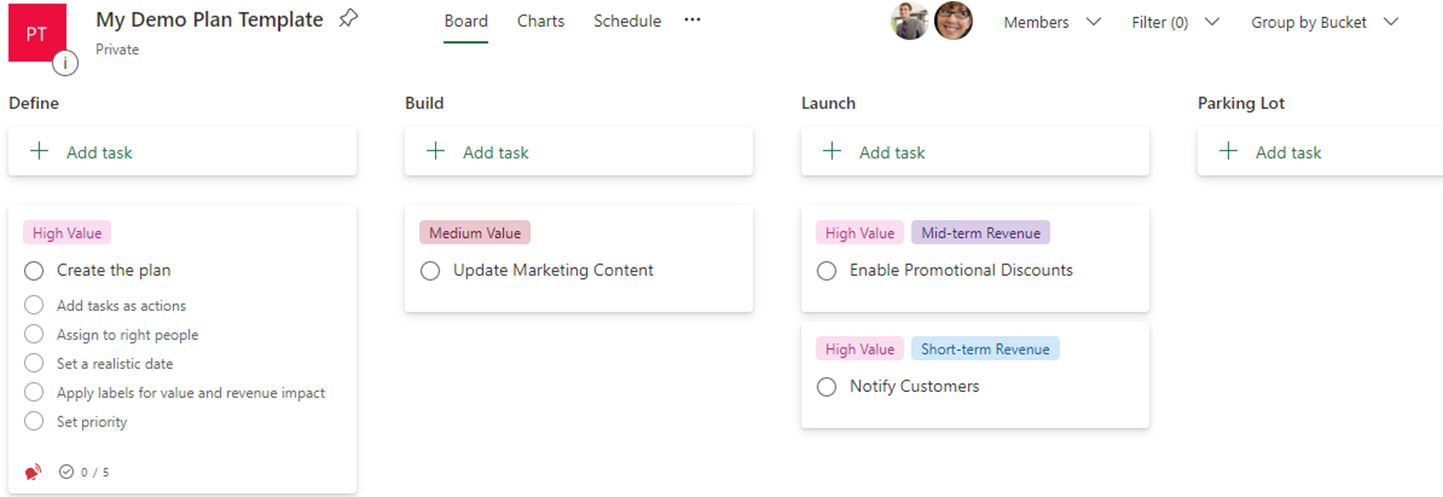
Users with access can copy this Plan template to other Groups for use.
Tip #9: Create a Microsoft 365 Group to store Planner templates. Make sure you grant member access to users who will need to copy templates from it.
Conclusion
Microsoft Planner is rich collaboration solution for organizing and managing teamwork. Planner also integrates well with Outlook and To Do. Hopefully, these steps were helpful on how and why to create a plan and how to take advantage of some Microsoft Planner’s top features.